One of the good practices in a data center or a cloud infrastructure is to manage the infrastructure as code. There are many different options in the market as CloudFormation, Heat, terraform, etc. to create and provision the infrastructure and code. On Internet we can find different comparisons for the tools:
CloudFormation and Heat are specific for AWS and OpenStack, and Terraform can be used for multiple cloud providers. In this article it’s going to be explained how to create a simple infrastructure in AWS with Terraform and Docker.
The sample application will have an Elastic Load Balancer, an EC2 instance with a WSO2 ESB, and an axis server with a sample service. This sample is based in the BASIC TWO-TIER AWS ARCHITECTURE from Terraform samples and the WSO2 ESB samples.
AWS account
The sample can be executed in the AWS free tier without cost.
First it’s necessary to create an account in AWS or use an existing one.
Once we have our AWS account, it’s necessary to create a secret key on aws.
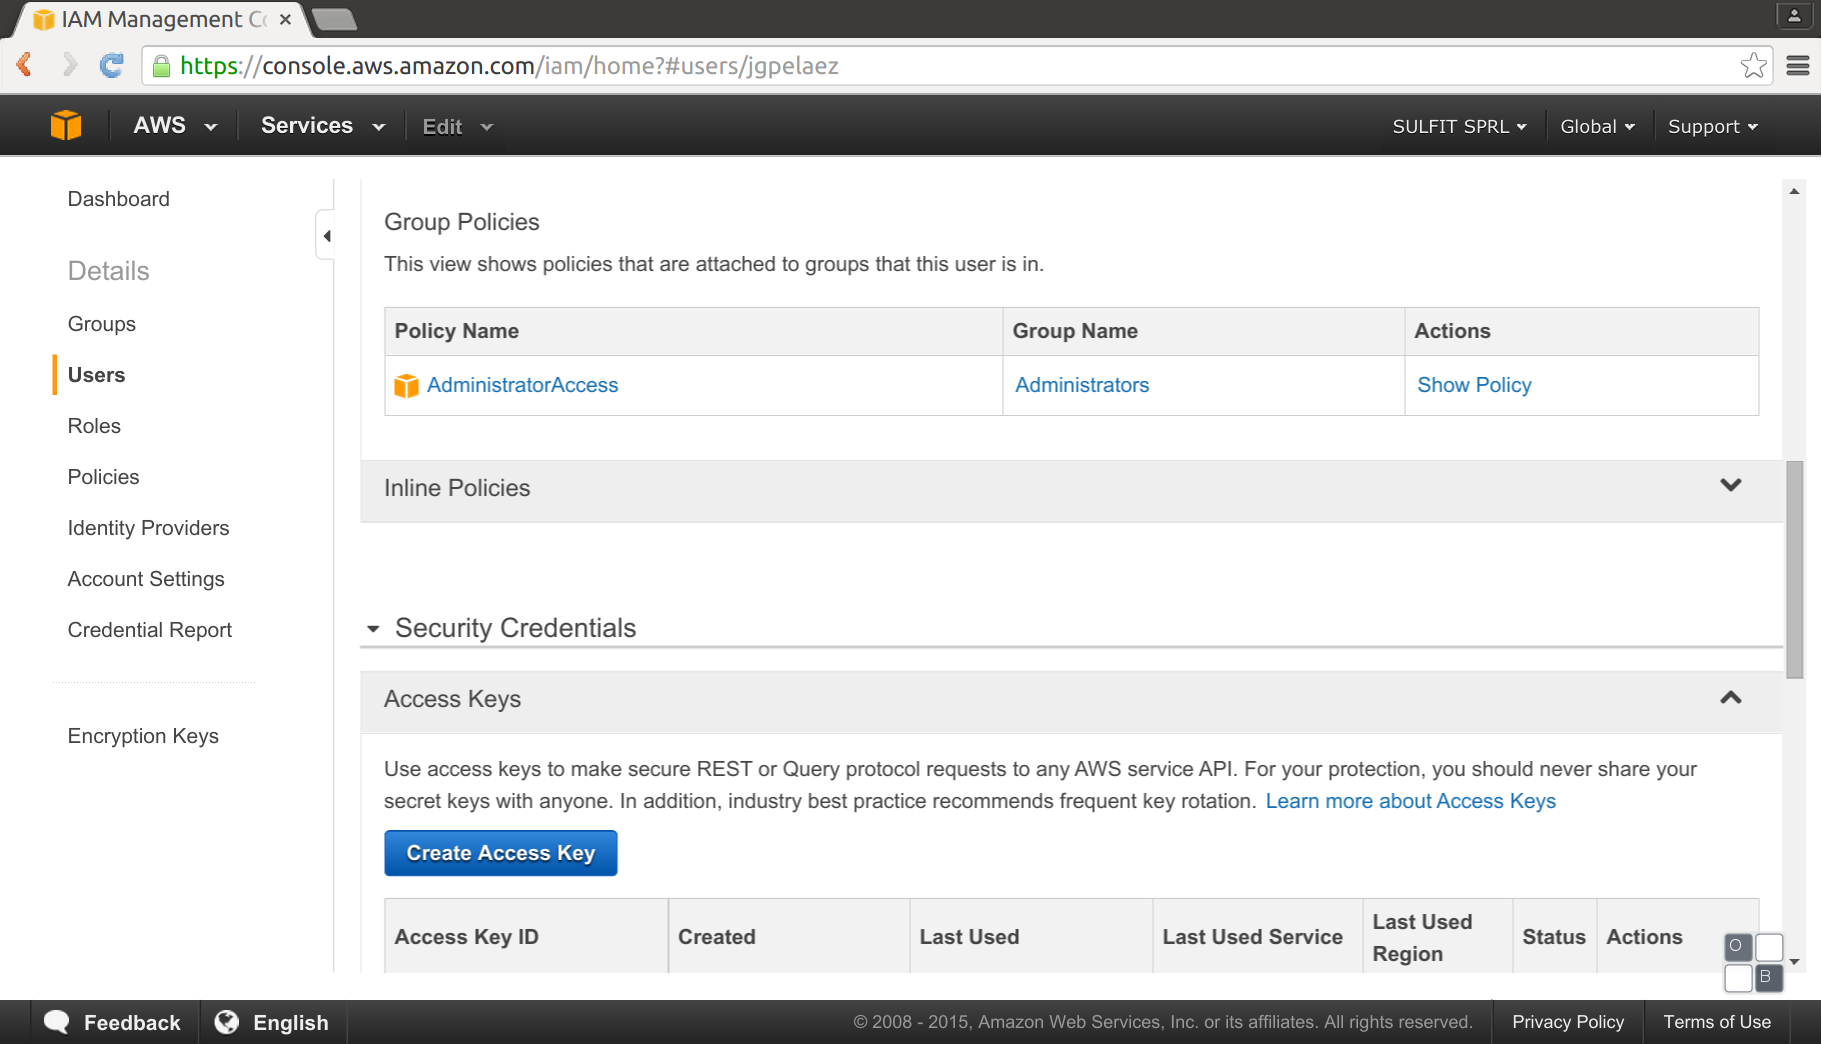
This secret key and password will allow to access AWS with the Amazon EC2 API, and internally Terraform uses it.
Use of terraform
Terraform can be installed following the instructions, but we can avoid it using a Docker image doing a search in the Docker Hub. Using a docker image it’s not needed to install additional software in your computer, and it also allows to use Terraform in unsupported operating systems. In a team everybody will use the same version of Terraform if we specify it in the execution scripts.
To obtain the Docker image, we can pull it, in this case:
docker pull uzyexe/terraform
Terraform project
Terraform uses text files to describe infrastructure and to set variables. These text files are called Terraform configurations and end in .tf. We can create the Terraform files, using the terraform dsl or in JSON format (all the .tf files will be executed in parallel if there is no dependency between instructions). In this sample the configuration files will be:
outputs.tf:
Outputs define values that will be highlighted to the user when Terraform applies:
output "ebs_address" {
  value = "${aws_elb.web.dns_name}"
}

output "ec_address" {
  value = "${aws_instance.web.dns_name}"
}
variables.tf:
Definition for some input variables as the region, instance type and region, the keys, and passwords will be parameterized.
variable "key_name" {
    description = "Name of the SSH keypair to use in AWS."
}

variable "key_path" {
    description = "Path to the private portion of the SSH key specified."
}

variable "access_key" {}
variable "secret_key" {}

variable "aws_region" {
    description = "AWS region to launch servers."
    default = "eu-west-1"
}

# Ubuntu Server 14.04 LTS (x64)
variable "aws_amis" {
    default = {
        eu-west-1 = "ami-5da23a2a"
    }
}
terraform.tfvars:
Replacement for the variables, in this file we put the user data information, for example the user key and password. This file should be added as ignored in the public git repository. We can store this files in private repositories (in bitbucket we can have unlimited private repositories for free)
main.tf:
Main file with our code for the creation.
In this file it’s created an AWS security group, Elastic Load Balancer and an AWS EC2 instance.
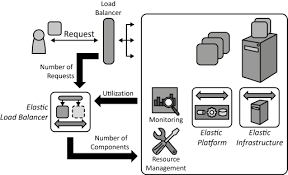
With the Elastic Load Balancer we would have in the future the possibility to dynamically add more services to our infrastructure. The instance is provisioned with simple shell scripts installing Docker images. The instance can be also provisioned with a custom Amazon Machine Image (AMI) or with a provisioner like Packer, Ansible, Chef, Puppet…
# Specify the provider and access details
provider "aws" {
    access_key = "${var.access_key}"
    secret_key = "${var.secret_key}"
    region = "${var.aws_region}"
}

# Our default security group to access
# the instances over SSH and HTTP
resource "aws_security_group" "default" {
    name = "terraform_example"
    description = "Used in the terraform"

    # SSH access from anywhere
    ingress {
        from_port = 22
        to_port = 22
        protocol = "tcp"
        cidr_blocks = ["0.0.0.0/0"]
    }

    # HTTP access from anywhere
    ingress {
        from_port = 443
        to_port = 443
        protocol = "tcp"
        cidr_blocks = ["0.0.0.0/0"]
    }

    # HTTP access from anywhere
    ingress {
        from_port = 80
        to_port = 80
        protocol = "tcp"
        cidr_blocks = ["0.0.0.0/0"]
    }

    # outbound internet access
    egress {
        from_port = 0
        to_port = 0
        protocol = "-1"
        cidr_blocks = ["0.0.0.0/0"]
    }
}


resource "aws_elb" "web" {
  name = "terraform-example-elb"

  # The same availability zone as our instance
  availability_zones = ["${aws_instance.web.availability_zone}"]

  listener {
    instance_port = 80
    instance_protocol = "http"
    lb_port = 80
    lb_protocol = "http"
  }

  # The instance is registered automatically
  instances = ["${aws_instance.web.id}"]
}

resource "aws_instance" "web" {
  # The connection block tells our provisioner how to
  # communicate with the resource (instance)
  connection {
    # The default username for our AMI
    user = "ubuntu"

    # The path to your keyfile
    key_file = "${var.key_path}"
  }

  instance_type = "t1.micro"

  # Lookup the correct AMI based on the region
  # we specified
  ami = "${lookup(var.aws_amis, var.aws_region)}"

  # The name of our SSH keypair you've created and downloaded
  # from the AWS console.
  #
  # https://console.aws.amazon.com/ec2/v2/home?region=us-west-2#KeyPairs:
  #
  key_name = "${var.key_name}"

  # Our Security group to allow HTTP and SSH access
  security_groups = ["${aws_security_group.default.name}"]

  # We run a remote provisioner on the instance after creating it.
  provisioner "file" {
      source = "./wso2-esb/"
      destination = "/tmp/"
  }
provisioner "remote-exec" {
   inline = [
        "sh /tmp/install-docker.sh",
        "sh /tmp/download-docker-images.sh",
        "sh /tmp/run-axis-server.sh",
        "sh /tmp/run-esb.sh"
    ]
  }
}
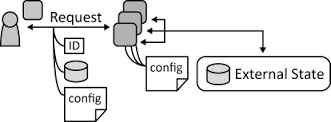
The shell scripts for provision the machine are simple scripts, creating an axis service and using the WSO2 ESB as a proxy. The idea of is to create an stateless instance, the ESB will proxy all the connections and do a logging (in the sample only in the log file, but can be in a remote statefull service, like a database or a S3 bucket). Following the stateless machine pattern we can add an remove dynamically instances depending on the traffic. To provision new services and escalate will be really simple.
The shell script files are:
- install-docker.sh:
#!/bin/sh
curl -sSL https://get.docker.com/ | sh
sudo usermod -aG docker ubuntu
echo added user to docker group
This script executes the installation of Docker and adds the user in the Docker group.
- run-axis-server.sh:
#!/bin/sh
. /tmp/set-env.sh

sudo docker rm -f $AXIS_SERVER_NAME
sudo docker rm -f wso2-esb-samples-as

#Creates a container
sudo docker run -d --name wso2-esb-samples-as -v $WSO2_ESB_PATH \
 jgpelaez/wso2-esb /bin/bash

mkdir -p target

axis_server_pid=$(sudo docker run \
  -d  \
  --volumes-from wso2-esb-samples-as \
  --name $AXIS_SERVER_NAME \
  webratio/ant sh $WSO2_ESB_SAMPLES_PATH/axis2Server/axis2server.sh -name $AXIS_SERVER_NAME)

echo "container id". $axis_server_pid
sudo docker exec -d $axis_server_pid ant -f $WSO2_ESB_SAMPLES_PATH/axis2Server/src/SimpleStockQuoteService/build.xml
This script executes a Docker container with ant executing an axis server. The execution code is in a volume with the WSO2 ESB samples.
- run-axis-server.sh:
#!/bin/sh
. /tmp/set-env.sh

sudo docker rm -f wso2-esb-samples

sudo docker build -t jgpelaez/wso2-esb-samples ../utils/esb/

sudo docker run  \
    -d  \
    -p 443:9443 -p 80:8280 \
    -v $WSO2_ESB_PATH \
    --link wso2-esb-samples-axis-server:wso2-esb-samples-axis-server \
    --name wso2-esb-samples \
    jgpelaez/wso2-esb $WSO2_ESB_PATH/bin/wso2esb-samples.sh -sn 0
Runs a Docker container with a WSO2 ESB configured with the sample number 0. The https 9443 port will be exposed outside through the standar 443, and the execution port 8280 with the 80 port. The –link will create a link with the axis server, and the axis server port doesn’t needs to expose the ports outside Docker.
Terraform execution
Before the execution, as it’s necessary ssh access to the EC2 instance we need to create a key pair in the AWS console, going to EC2 dashboard, Network & security: 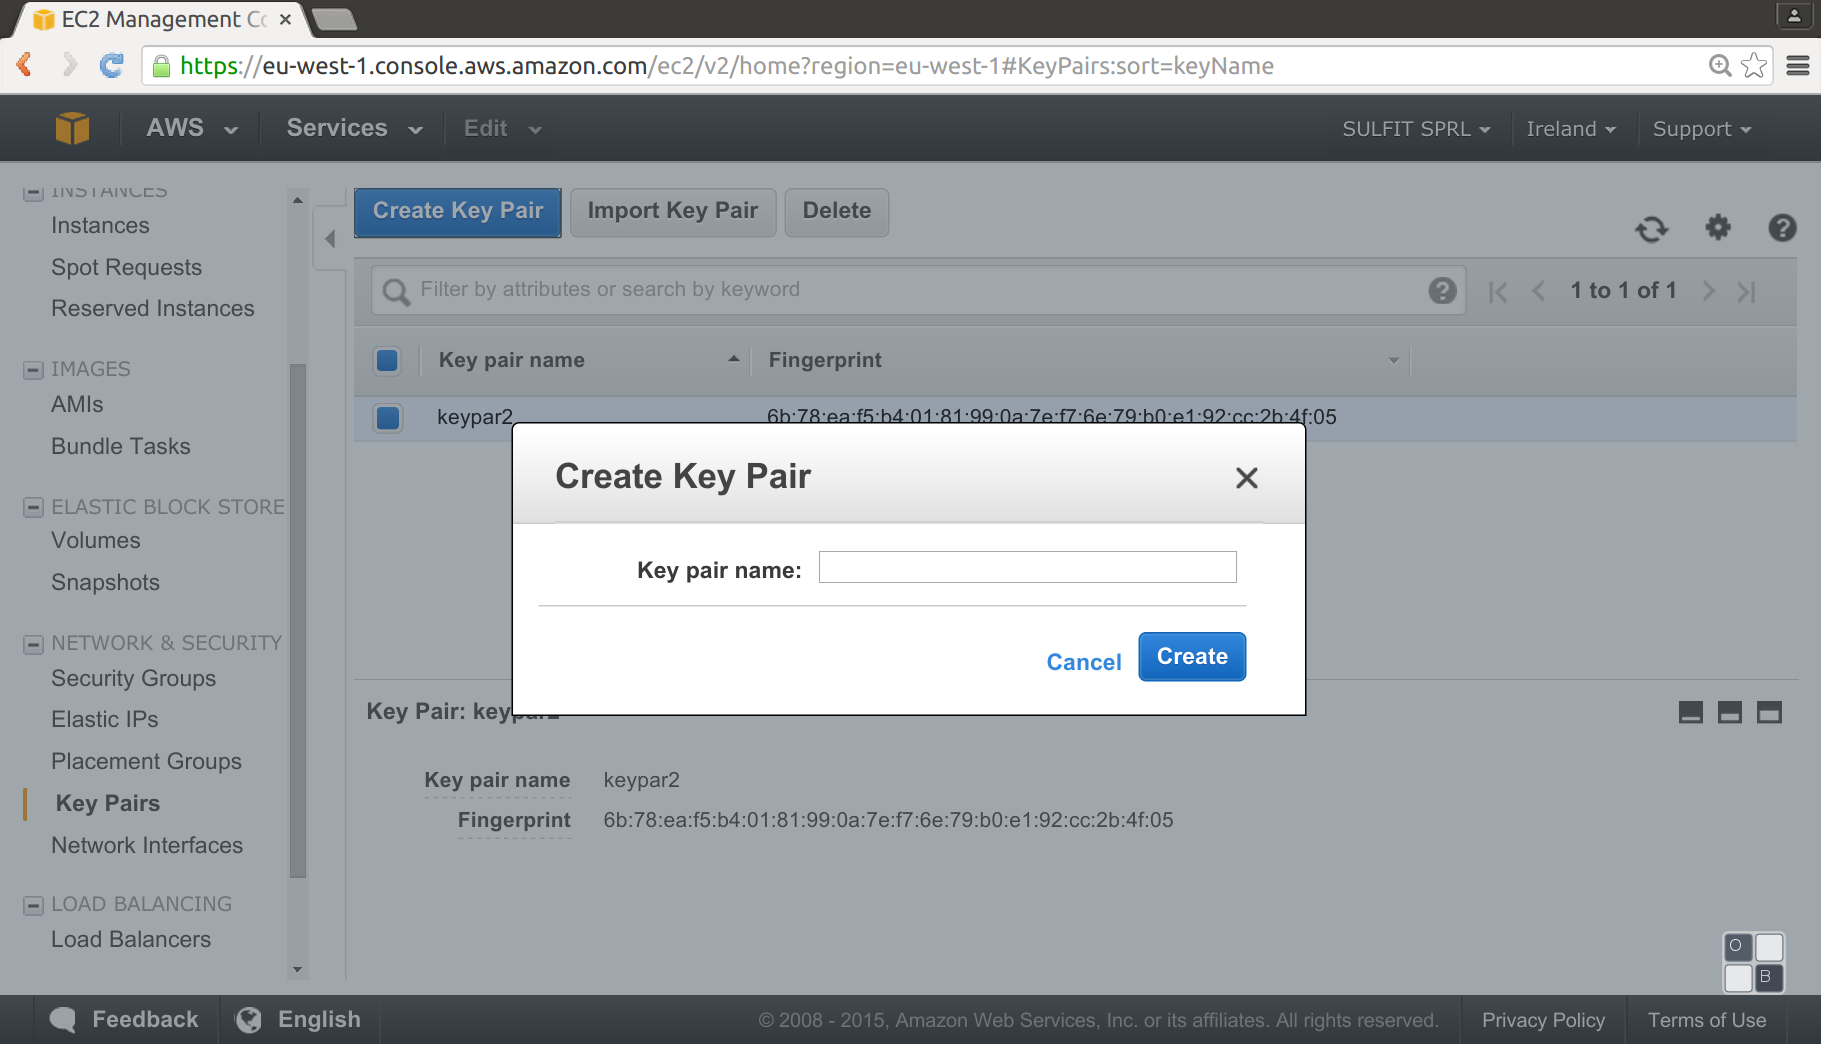
Will create a “.pem” file, this file will allow to access Terraform through ssh.
Execution plan:
The Terraform plan command is used to create an execution plan. Our first execution will be:
docker run \
    --rm \
    -v $(pwd):/data \
    -v /home/jgpelaez/git/ec2-instance/data/:/data-ssl \
    uzyexe/terraform plan \
    -var 'key_name=keypar2' -var 'key_path=/data-ssl/keypar2.pem'
With -v it´s sharing the host folders with the container, the /data for the .tf files and the /data-ssl for the key ar previously created. The execution will create an initial plan file called terraform.tfstate
After the creation of the plan, can be applied and create the real infrastructure with the instruction apply:
docker run \
    --rm \
    -v $(pwd):/data \
    -v /home/jgpelaez/git/ec2-instance/data/:/data-ssl \
    uzyexe/terraform apply \
    -var 'key_name=keypar2' -var 'key_path=/data-ssl/keypar2.pem'
Will create the infrasctructure in the AWS, and print the ouput variables:
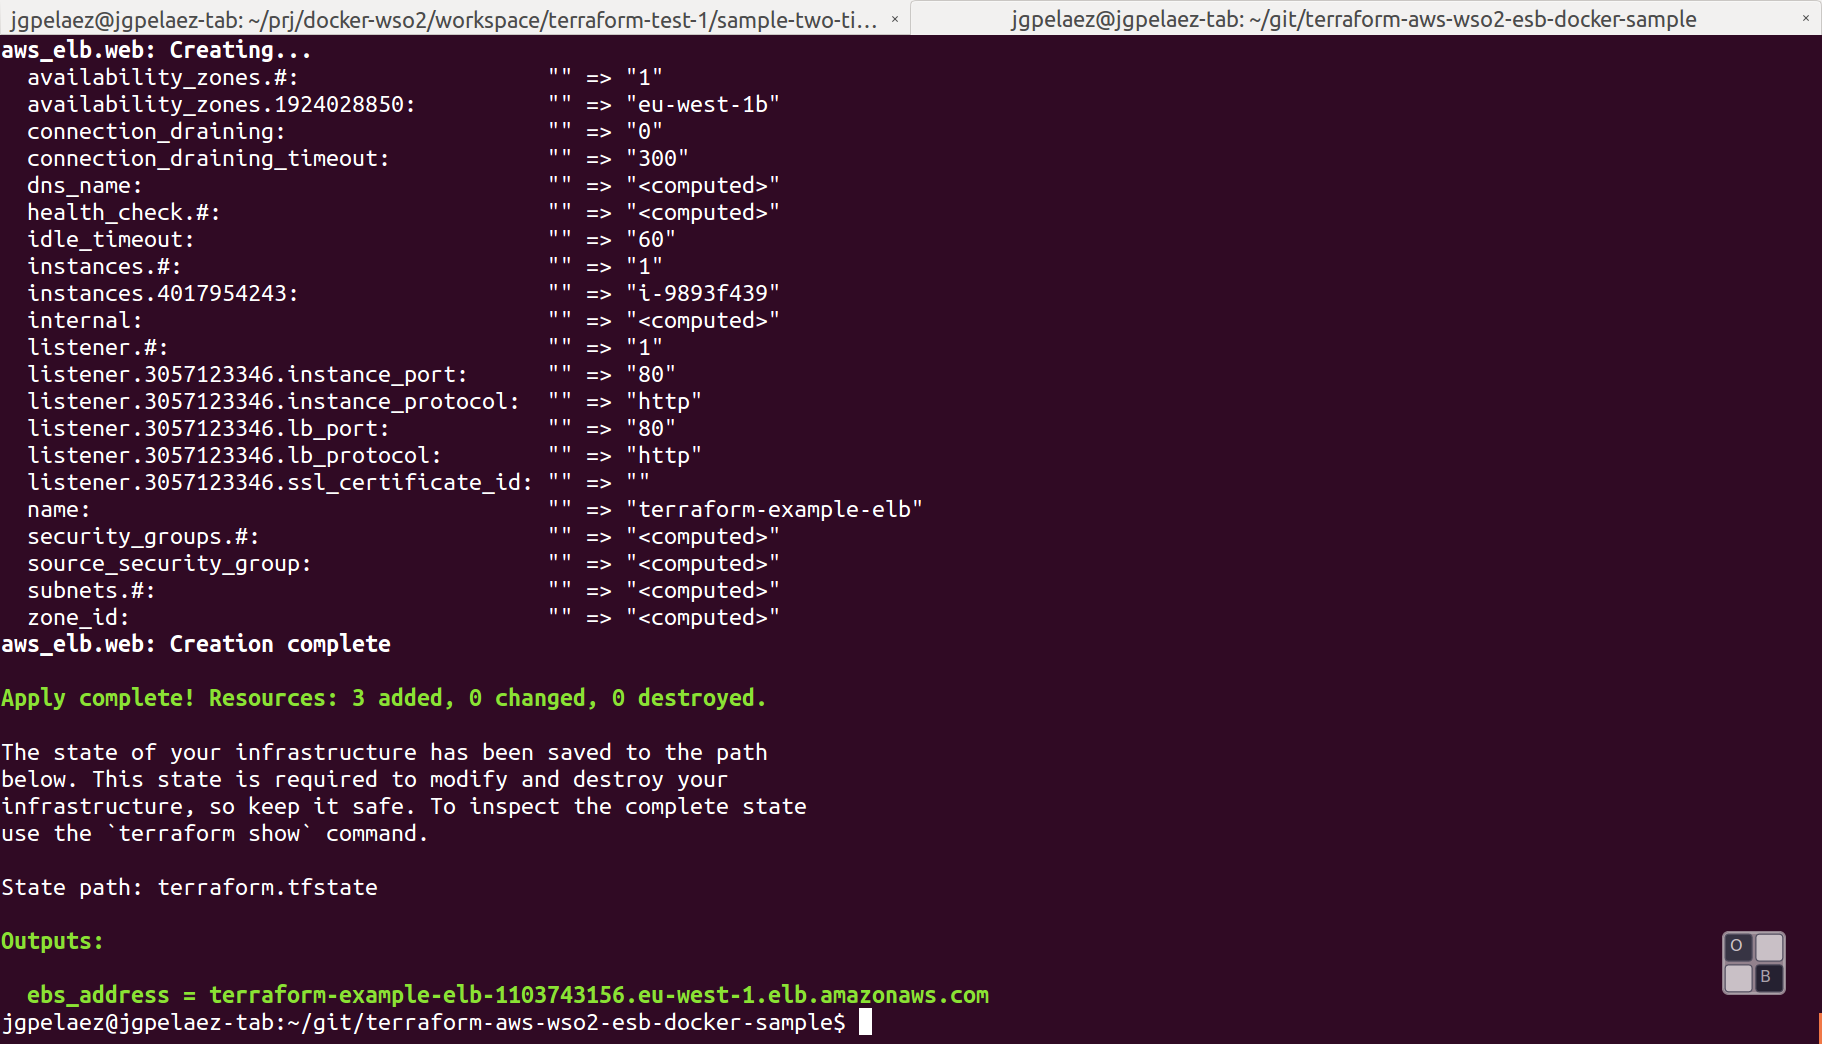
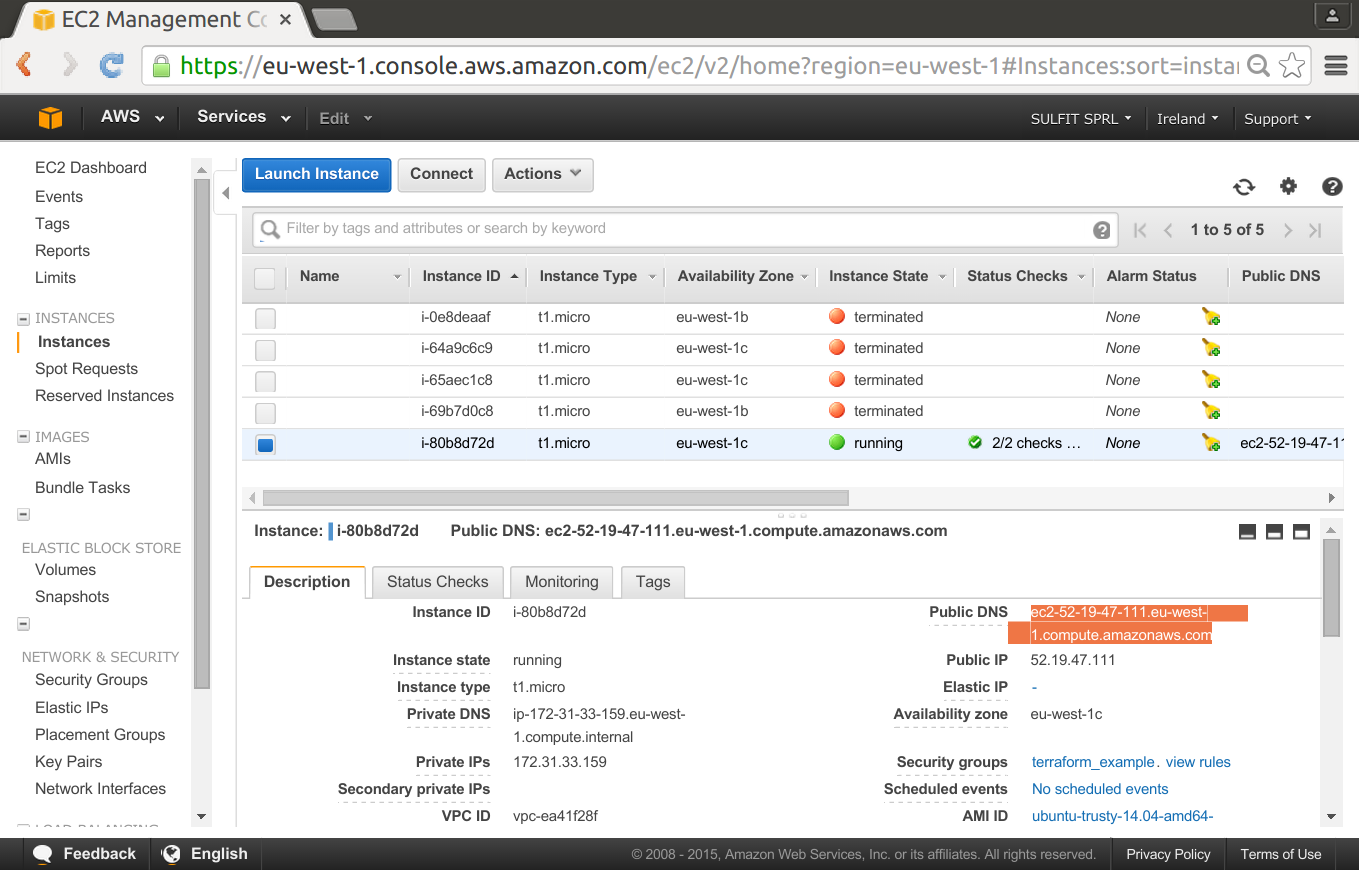
In the AWS console will appear all the structure defined in the .tf files, a new running instance, one volume, a new Load Balancer and a new group:

Checking the instance detail can obtain the public DNS, the WSO2 ESB management console is not exposed through the load balancer, and normally it should be restricted to be acceded from an specific ip in a security group.
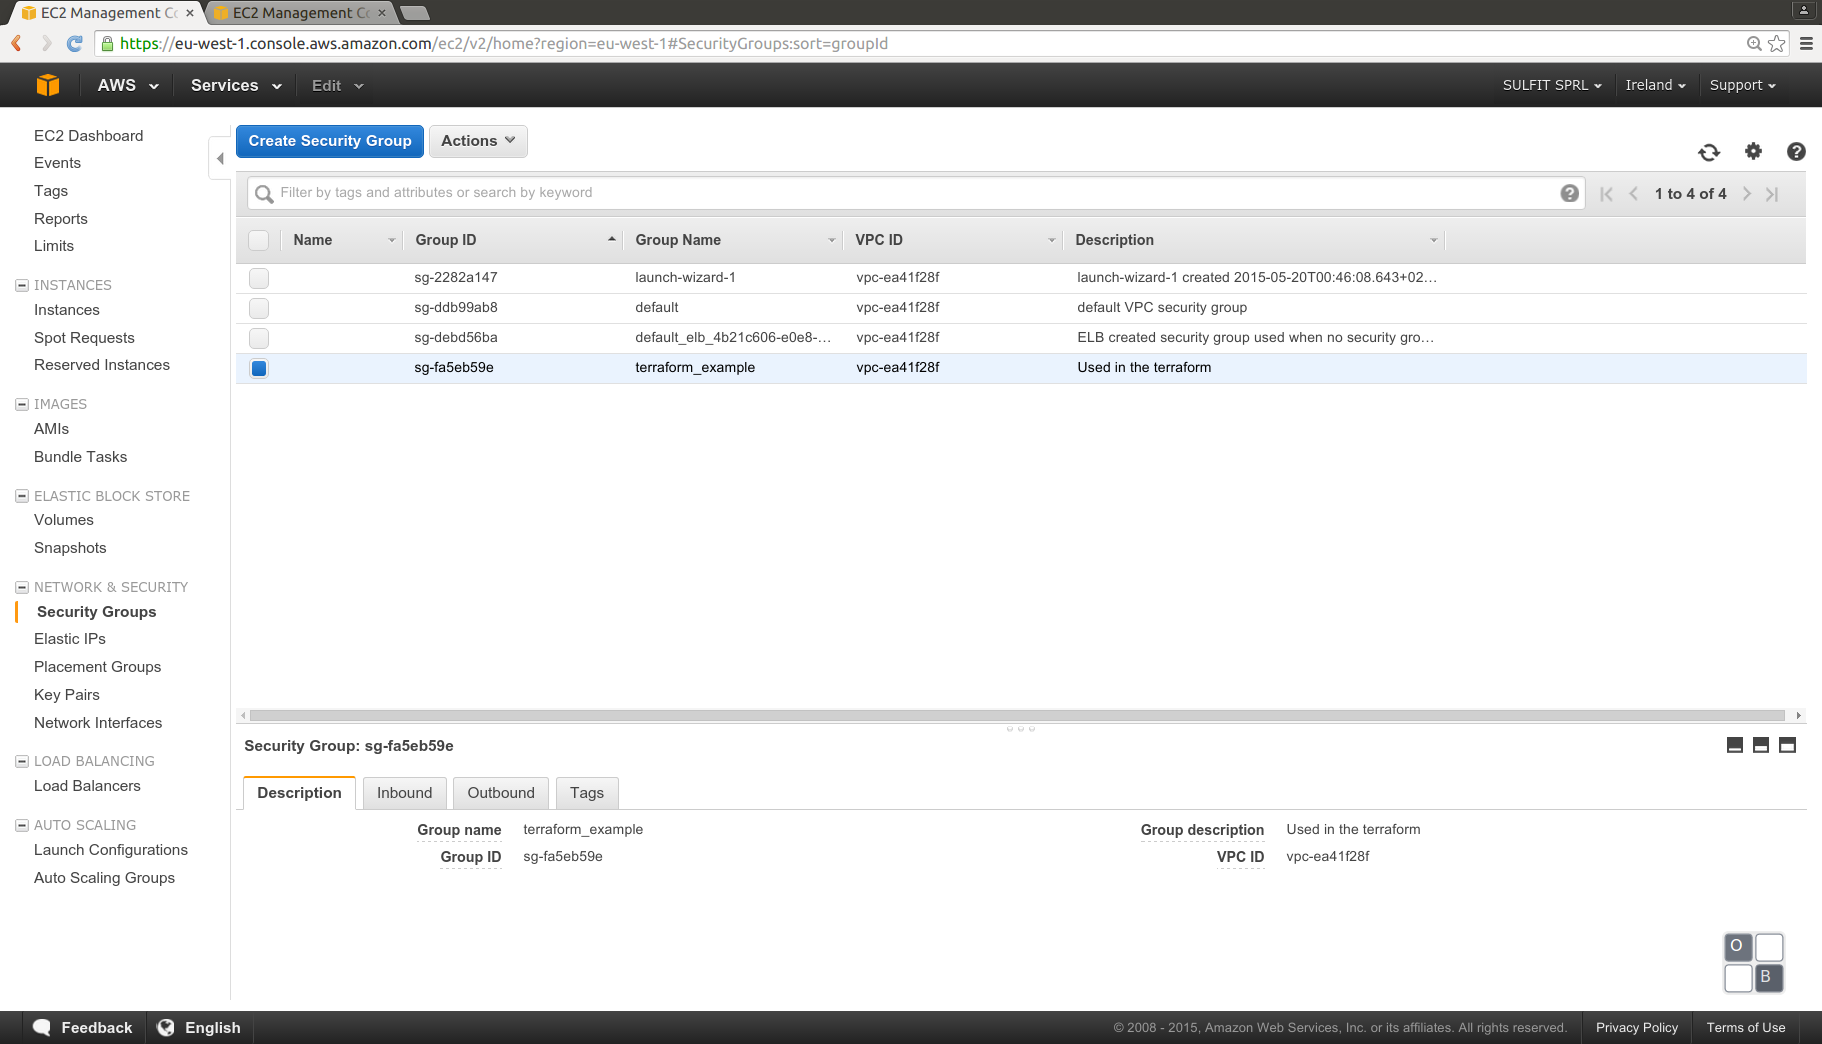
We can see in detail the security group created:
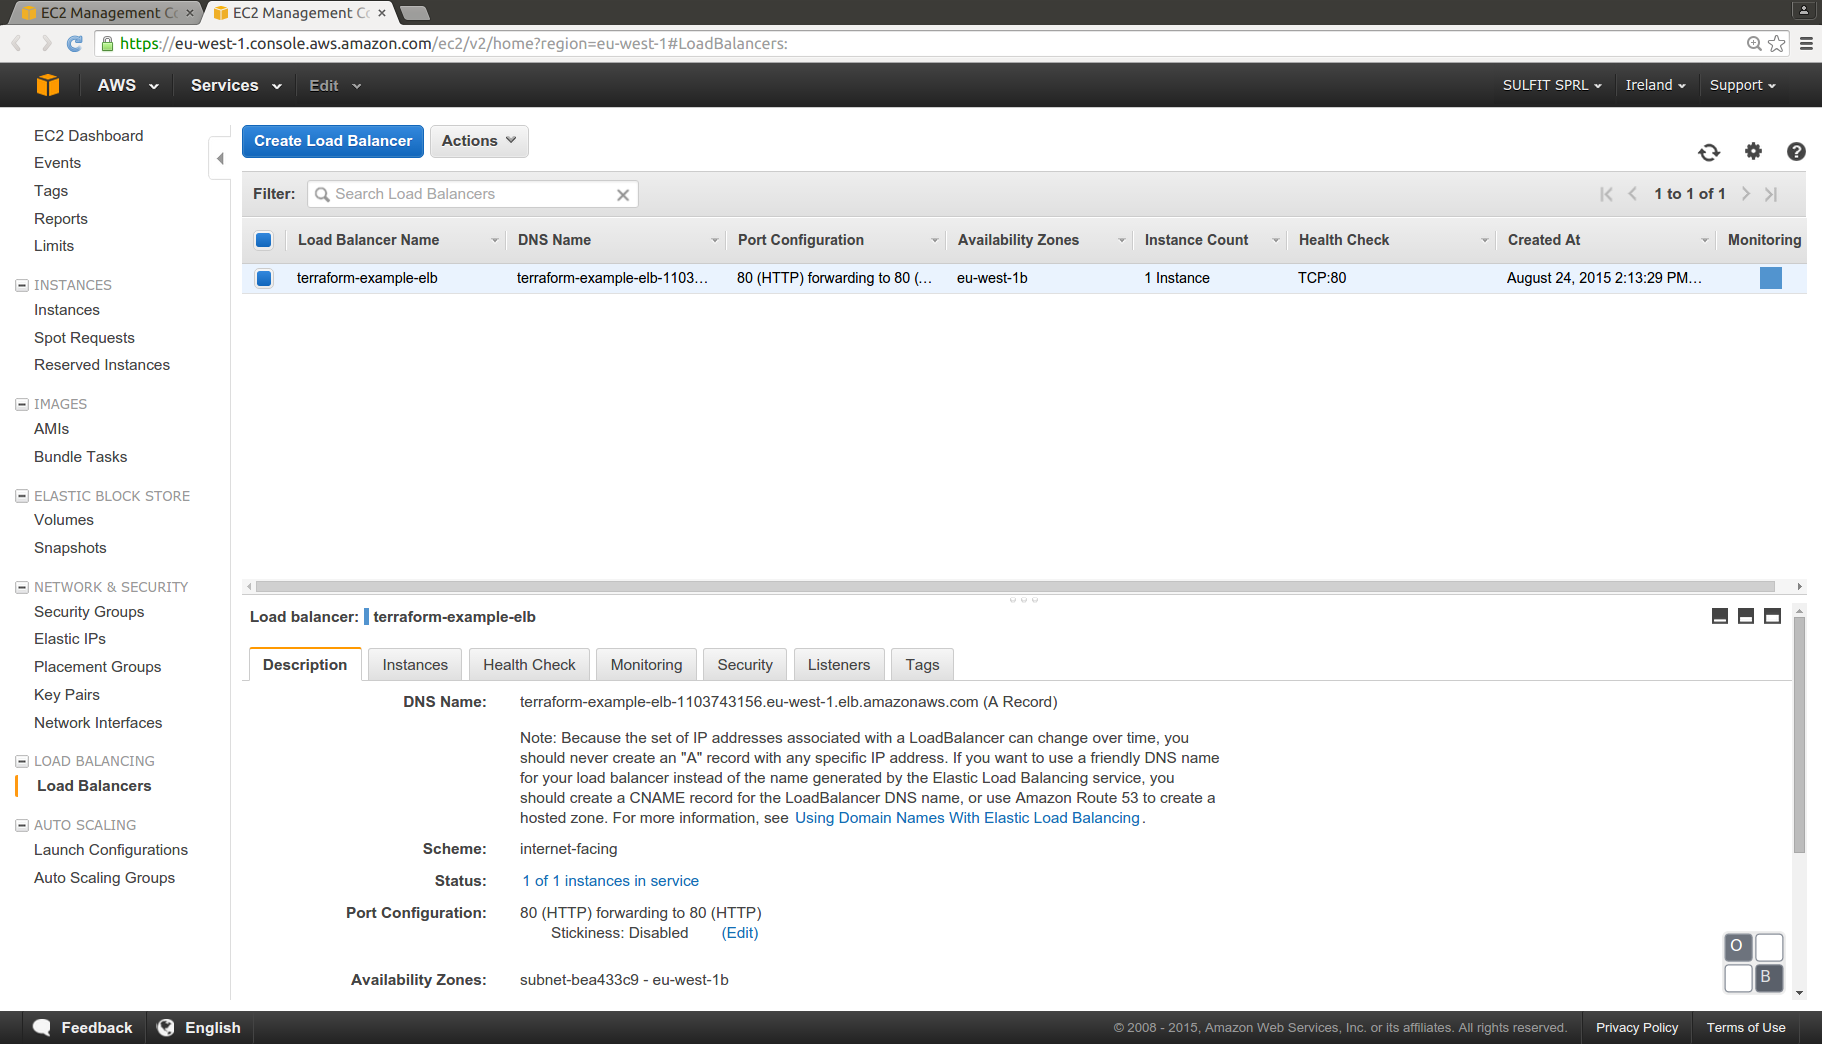
We can see in detail the Elastic Load Balancer:
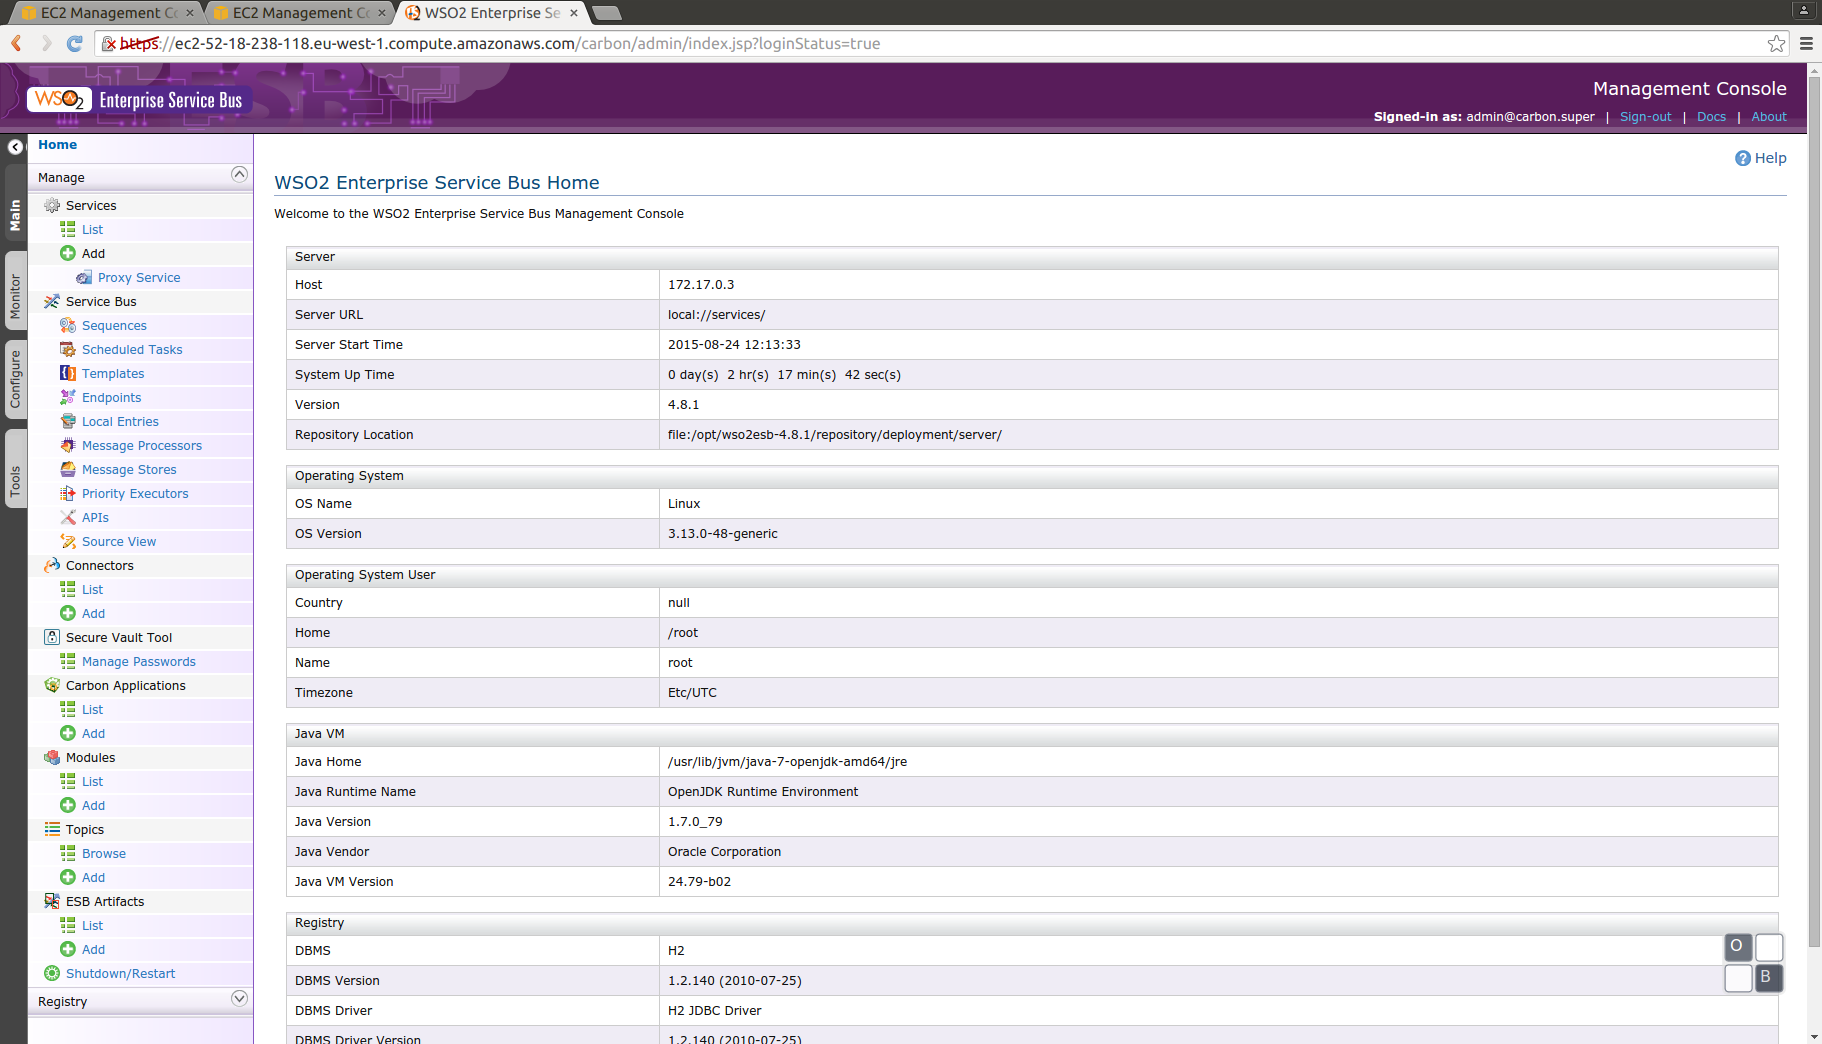
Using the public DNS for the ec2 instance we can check if the WSO2 ESB admin console is running (user and password are the default admin/admin)
Execute a client for the service:
As we are using the samples from WSO2 ESB, it’s possible to use the sample client. It can be executed in our local system, and will demonstrate if all the infrastructure is correctly working.
In local can be also executed with Docker, using the script /wso2-esb/run-client.sh:
#!/bin/sh
. ./set-env.sh

WSO_ESB_SAMPLES_SERVER_NAME=$1

export CLIENT_ARGUMENTS="-Daddurl=http://$AXIS_SERVER_NAME:9000/services/SimpleStockQuoteService \
   -Dtrpurl=http://$WSO_ESB_SAMPLES_SERVER_NAME/"

echo Running wso2 client sample with arguments: $CLIENT_ARGUMENTS

docker rm -f wso2-esb-samples-client
#Creates a container
docker run -d --name wso2-esb-samples-client -v $WSO2_ESB_PATH \
 jgpelaez/wso2-esb /bin/bash

docker run \
  --volumes-from wso2-esb-samples-client \
  webratio/ant ant stockquote -f $WSO2_ESB_SAMPLES_ClIENT_BUILD \
   $CLIENT_ARGUMENTS
The address will be the public DNS of the Elastic Load Balancer:
sh run-client.sh terraform-example-elb-1103743156.eu-west-1.elb.amazonaws.com
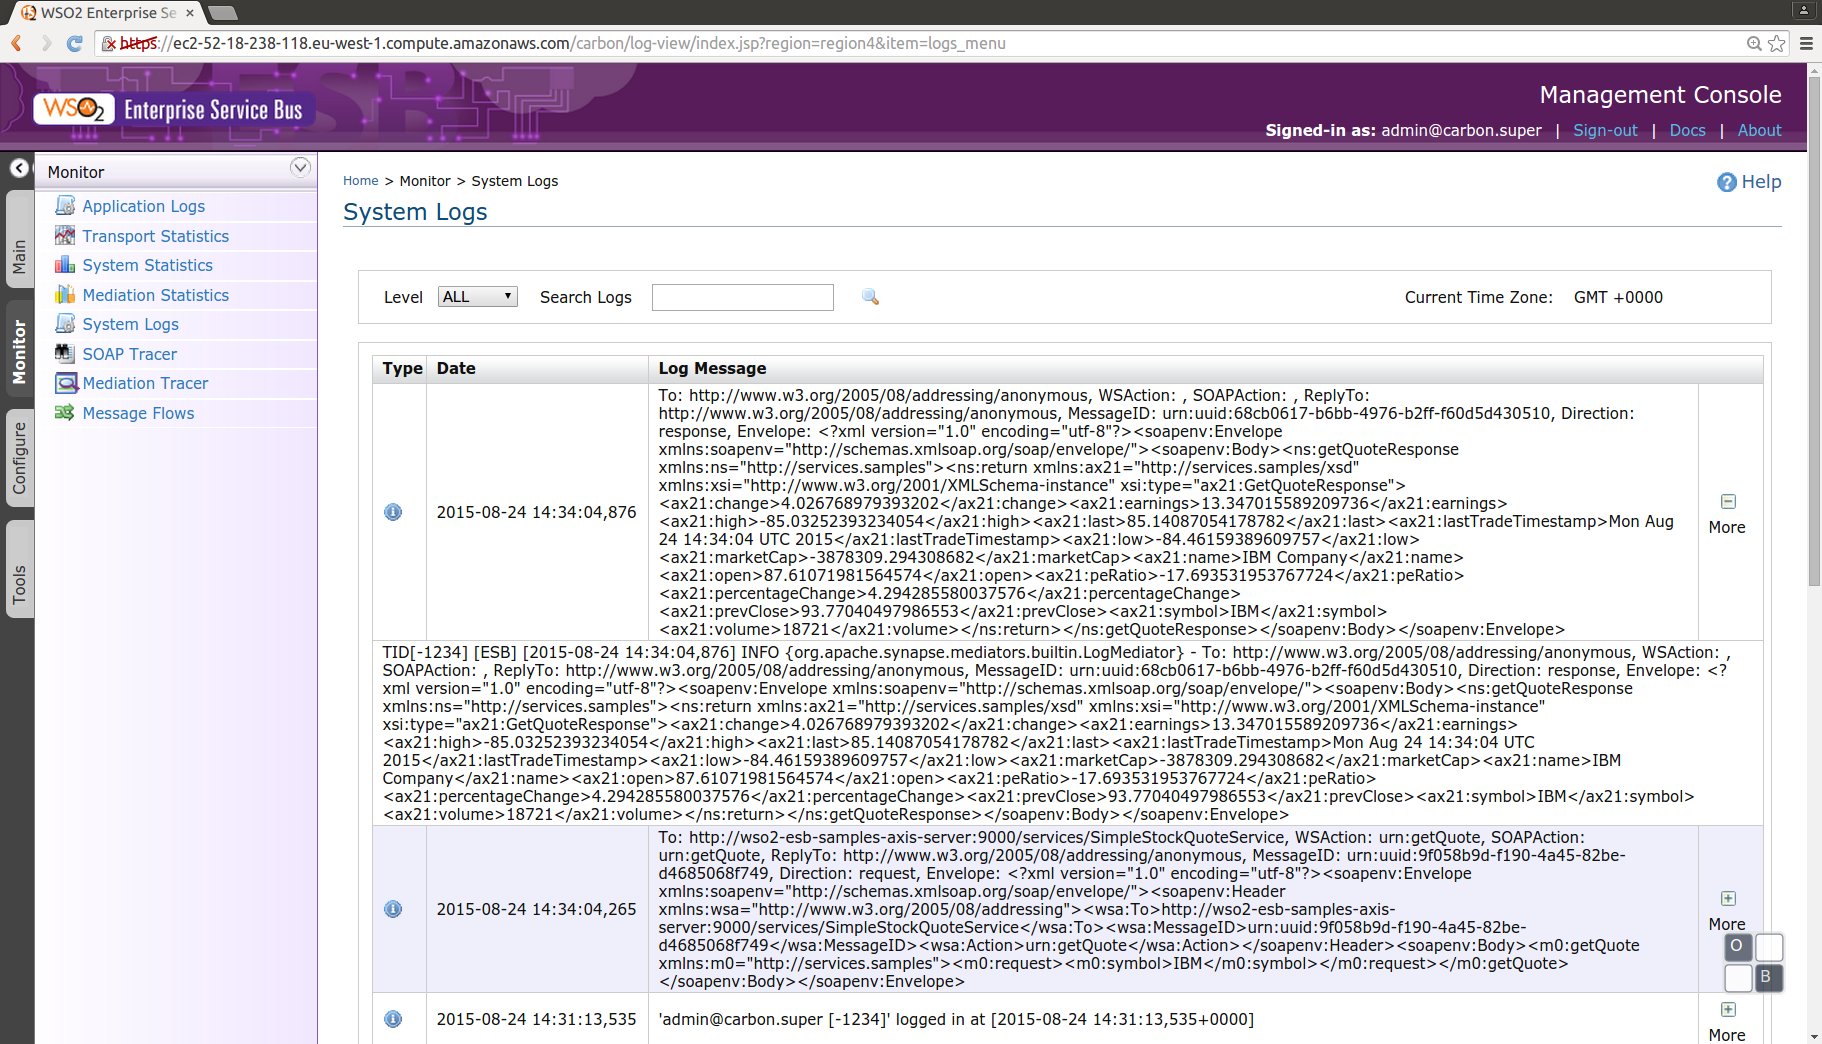
This command will send a SOAP request to the Elastic Load Balancer, the ELB will proxy the request to an instance (in this case there is only one in execution), the WSO2 ESB will log the input and ouput, and proxy to the Axis Server, and return the results to the client. In the WSO2 ESB management console we can see the logs:
Remove resources:
For avoid charges in our AWS account, finally we can destroy the resources created, first we can ask to the plan what is going to be destroyed:
docker run \
    --rm \
    -v $(pwd):/data \
    -v /home/jgpelaez/git/ec2-instance/data/:/data-ssl \
    uzyexe/terraform plan -destroy \
    -var 'key_name=keypar2' -var 'key_path=/data-ssl/keypar2.pem'
And remove everything with the destroy instruction, using Docker it’s necessary to add the -force flag.
docker run \
    --rm \
    -v $(pwd):/data \
    -v /home/jgpelaez/git/ec2-instance/data/:/data-ssl \
    uzyexe/terraform destroy \
    -var 'key_name=keypar2' -var 'key_path=/data-ssl/keypar2.pem' \
    -force
Conclusion
This is a very simple example of the use of Terraform and Docker as infrastructure as code, in a real project it will be more complex and use other layers as database, etc. We can also use other interesting features like autoscale, or use terraform with other providers, or have the infrastucture using different providers at the same time.
Terraform will also allow to do modifications using the concept of state. The infrastructure as code will simplify our future changes, and gives and easy way to see our infrasctructure, and know wich resources we are using.
With the stateless instances concept using Docker will be more simple to escalate our infrastructure simply adding new services in a very simple way.
Resources
- Source code in github/jgpelaez.
Thanks / Contributions
- If it’s useful code you can favourite it in: GitHub
comments powered by Disqus